The first tutorial in
Inkscape today, I want to show you how to create a seamless pattern. We will be
creating the cute birds and owls pattern using the Ellipse tool, the Polygon
tool and the Clone.
Create
the Owl
Step
1
1. Create a New File Document in Inkscape. Firstly,
we make the owl’s body. Draw an ellipse with the Ellipse tool (F5). Go to
Object>Fill and Stroke (Shift+Ctrl+F).
Fill it with CMYK color mode #abc837ff
(picture 1).
2. Draw a triangle shape with
the Polygon tool. Fill it with #44550072.
Rotate it 45°. Copy and Paste. Flip it Horizontally. Select both by (F1). Align them Horizontally or Object>Align
and Distribute>Center on Horizontal Axis (Shift + Ctrl + A). Place the
ears behind the body (picture 2)

Step
2
1. Lets create the eyes.
Draw two circles. Place them like image below. Fill the color with #2b2200ff.
Go to Path>Union (Ctrl + +).
2. Make three circles.
3. Lets draw his nose. Make
it by triangle shape. Fill the color with #decd87ff. Go to Path>Object to Path (Shift+Ctrl+C). Pick the Nodes tool (F2). Choose Make Selected
Nodes Auto-Smooth.
4. This result image.

Step
3
1. Make two circles then
overlapping like this.
2. Select both (F1). Go to Path>Difference (Ctrl +
-). Fill it with #504416ff.
3. Make some feathers by (Copy and Paste) like this.

Step
4
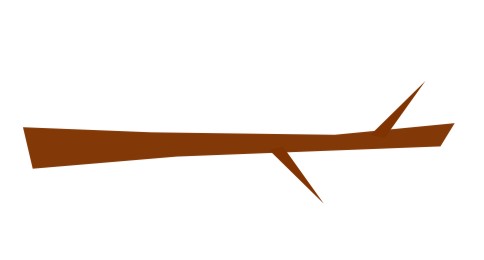
Draw a triangle shape again.
Grab the Stars and Polygon tool in
the Tool Box. Choose the Polygon mode, set Corners: 3. Go to Path>Object
to Path (Shift+Ctrl+C). Using the Nodes
tool add node on the center of the top node, go back to Path>Object to Path (Shift+Ctrl+C). Pull the top node a bit up
and click on Make Selected Nodes Symmetric
button. As same as for the right and left side node. After that just drag the
bottom node a bit down. Fill it with #445500fe. Make a triangle shape for the
nail. Fill it with #f4e3d7ff.
Then duplicated it by Edit>Duplicate (Ctrl+D). Create
three feet. Group them. Then Duplicate
it for the right owl’s feet.

Step
5
Draw an ellipse for the
owl’s wing. Rotate it 120°. Fill it
with #ffdd55ff. Make a copy the owl’s body. Selected it and the ellipse shape
then go to Path>Division (Ctrl+/). Do same step to the right owl’s wing.

Draw
the Cute bird
Step
6
Draw a brown ellipse for the
body and modify the nodes into like image below.
For the bottom of the beak,
fill its with #d4aa0ff. Create the eyes, the tails, and the feet.
Put the beak, the tails, and the feet behind the owl’s
body.

Step
7
For the wing, just duplicate
the body shape.

Draw
the Second Bird
Step
8
Grab the Ellipse tool. Holding the Ctrl key and drag into your canvas
area. Go to Path>Object to Path
(Shift+Ctrl+C). Adjust the curve of the body shape like image below. Fill
it with #9955ffff.

Step
9
1. Create two circles. Put
them like image below.
2. Go to Path>Intersection (Ctrl + *). Drag a bit wider.
3. Change the top node to Make Selected Nodes Smooth.
4. Drag the bottom node a
bit down. Fill it with #d5ffe6ff.

Step
10
Put the wing like this. Then
give the bird a black beak and the eye.

Draw
the Third Bird
Step
11
Draw the body shape for our
third bird. Set the fill to #de87aaff. Make simply eyes and the peak.

Step
12
For the wings, create three
ellipses and adjust the wings like image below. The fill #782167f8. Duplicate the wing. Flip it Horizontally.

Step
13
This is the result of our
the third bird.

Step
14
Time’s for create the stem.
You just simply make a long regtangle shape. Convert Object to Path (Shift+Ctrl+C).
Modify the regtangle to this (see below image). Add triangle shapes for the
branches.
Step
15
Create one circle and some
highlight using the Bezier tool
(Shift+F6).

Step
16
Put all of the stem
elements.

Step
17
Now, I make another simply
the stem with the leaves. Draw the leaf using the Ellipse tool. Convert Object
to Path. Delete the right and left node. Drag the upper-handle points to
the bottom. For the top node, select the Break
Path option.

Step
18
Let’s give the bird a house
with the rounded regtangle shape.

Step
19
I have simply flower or you
can create another flower as what you want.

Create
the Background
Step
20
Drag the Regtangle tool. Create a square. Set
its 600 x 600 pixel. Set the color is #f4e3d7ff. Go to menu Object>Lower to Bottom (End). This
will be our base tile. The important thing, you must to duplicate the bird (Ctrl+D) and go to Object>Transform>Move (Shift+Ctrl+M). Fill the Vertical axis to -600 px.

Step
21
You’ll see the bird moving
to right place.

Step
22
Fill the end of the
background with the stem, another bird and the flower like picture below.

Step
23
Select all objects of the
end background. Group them together.

After you grouping, you’ll
see the left picture, the owl’s feet is not incorrect place so I send the owl
above of the stem again.

Clipping
its
Step
24
Duplicate the background (Ctrl+D). Now you see the background on
the top. Select the group of the birds on the end of the background and the top
square. Go to Object>Clip>Set.

Step
25
Tadaa! You almost done
create the tile pattern. Now, all of objects into the base square. Select all
objects again or drag marquee (F1) and
group them by (Ctrl+G).

Clone
the Base Tile
Step
26
From the menu, go to Edit>Clone>Create Tiled Clones. I
set the P1: Simple Translation form
the drop-menu on the Symmetry option. Set the value of the Rows and Columns to 2 x 2.
Don’t forget to do this important thing, make sure the option ‘Use saved size
and positon of the tile’ is checked. Click on the Create button in the Clones
dialog.

Step
27
This is the results. But it
is not finished yet.

Step
28
Go to Edit>XML Editor (Shift+Ctrl+X). On my case, you’ll see the width
and height for the tile set as 977 and 709.99918. We made the background is
600x600 pixels, right? Change the inkscape:tile-h
to 600. Click on the Set button.

Step
29
Do same thing to the inkscape:tile-w to 600.

Step
30
Move the original tile out
of the way. After that, select all objects. Group them by Ctrl+G.


Conclusion
We have just created a
seamless cute birds and owls Pattern using Inkscape tool. It’s such a good
tool, right?
Please add some comment
below or maybe you want show off your own pattern.
No comments:
Post a Comment